Tuesday, March 24, 2009

Progress and more progress

With the help of my wife, Julie I have been able to spend more time on the skiff. I have continued to fit the skiff up for the season. I have been working on fitting floors, running shift linkage, installing gauges and more trim. It was a challenge to put the rub rails on alone but it was interesting. The gauges Pat Powell did are great! I had to get a replacement temp gauge since the one I had would not work for my set up. I created a basic ring painted black to make up the size difference.


It was challenging to run the new copper oil line and not kink it. I was able to fit it up but I wonder about the connection it cannot be tighten much which makes me nervous. I may disassemble it to re-check everything.

I finished up the floors and tried something different with the shift lever. My boat had problems with the linkage and someone tried to fix it. I have tried to sort it out further with repairs to the keelson and rework of their repair. It does not look nice but it is functional and I believe will last.


I worked on the rear bench seats by installing the supports. I may add a doubler to the seat to make sure I capture the screw. I also spent more time on my engine box sanding and rounding the table edge. I will try and cut the plywood for the sides. Thanks to John Paul for the loan of an engine box to make templates.


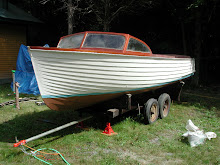
Here are some pictures of the bow after I put the trim pieces on.


I am hoping to borrow a shaft alley hatch to recreate it for the skiff, mine did not have one. With the warmer weather coming I am hoping to get some final painting and varnishing done. I need to install my running gear and need the temp higher for the 5200 to cure corectly. I am looking forward to my new tank arriving and finishing the interior. I want to get started on starting my motor to get it ready for install.

Tuesday, March 10, 2009

Snow melting, mud sloshing, is this the start of Mud Season?

Time is flying here at Button Bay. The ice is still with us and the snow is melting pretty quick. The past few weeks have been a weather roller coaster of snowing one day, raining the next with flood warnings to boot.

Work on Frolic has really been steady and progress shows. Last update I was working on floors. I painted the floors and have now covered them with Nautolex form an idea of Myndy Woodruff. They look great. I did not glue them down but pulled the fabirc around and stapled them with 1/4" monel staples. I really like how they turned out.


The engine box is going together well. I borrowed a plate joiner form my brother-in-law Jeff Spencer of Red House Building to assemble the basic frame with West System and biscuits. Clamping the angles was interesting but I used wedges to make the pieces square so the bar clamps would hold. I to assemble it in sections, sides first, then assembled the box.


Once I had the basic box frame together I put the cross pieces in for the table top. I also worked on making the table top like I did the frame with Biscuits and West Sytem epoxy.


With the top set I began sanding then fitting it to the box frame. Once I had the top on and secured I took a 1/2" round router bit and finished the sides.


I also ordered a Rayco fuel tank for the boat instead of trying to reuse the original tank. Once I have the tank I can finish putting the stearn section back together. I think I will also try to fasten some of the floors in so I can finish the front fit up and install the seats.

Wednesday, February 25, 2009

Engine Box, Floors, and working on a 1903 Lozier Launch!

Well we are having variable temperatures so on day is just above freezing and others are really below freezing. I have been able to work on various things on the boat and have spent time with Jody Lapham and his Lozier Launch. Jody has been great with helping on my project. Recently I was at his shop and he helped me dress and cut my boards for my engine box, Thanks Jody! Here are some pictures of our efforts.


Jody had a piece of Mahogany that I can use for the engine box uprights as well as new engine blocks. I shifted gears to the floors after this because Maine Coast Lumber has a sale on Meranti which is what they use to sell as Philipine Mahagoney. It is a really good sale to the point that the plywood was cheaper than fir so I did the floors out of it as well.

The floors came with some Nautolex on them but I think this boat cam with painted floors. I am taking Myndy Wooddruff's suggection to cover the floor with the new Nautolex flooring, we chose natural. Right now I have cut out the floors with a jig saw, they came out pretty good but not perfect. I think they will look fine when they are covered.


I then took the floors and started applying Poly to the floors to get them ready to cover. I caught a great deal on Nautolex 72" bolts at $17.95 a yard. I have 2 coats on one side and am ready to flip them over to do the other side.


The next step after painting is covering and refitting the floor. I am hoping to have this done this weekend as long as I can finish the painting. I have been thinking of investing the money in a new gas tank but they are pricey as compared to the $100.00 you would spend on a tank kit. We will see, maybe if I can sell some Harley parts this would be easier to decide.

Thursday, February 19, 2009

Making Headway

Things are starting to pick up! I have been putting more chrome on and working on the various wiring needs. I put the step boxes in and like the way they turned out. I reused everything including one top that was cracked all the way through. Here is a before and after photo.


Here are some more detail photo's, one you can see the repair to the lid. All in all it went pretty good and installation was pretty straight forward.


I am putting the chrome back on and will re-chrome pieces in the future as I can afford the plating cost. I cleaned the individual pieces as best as I could but some are missing plating and most pieces are not bright like new chrome.


I also have been working on the bilge pump wiring and hiding a switch under the gauge cluster. I got a rule swith and disassebled it so I could mount the switch through the bulkhead. The power light and inline fuse are on the other side of the bulk head. I installed in an existing hole a LED light wiht the switch so I can see if power is coming in.

I have also came across a sale on Meranti, which is basically what use to be sold as Phillipine Mahagoney. It is pretty regulated in how it is harvested and matches the existing wood perfectly. Maine Coast Lumber has it on sale for $52.50 a sheet for 3/8. It was cheaper than marine for plywood, so my floors will be made of Meranti and I am covering them with Nautolex Natural. I found the best price for the Nautolex at Defender $17.95 a yard. That price is for 72" material not 54". Most places are selling for $29.95 a yard.

More to come with the floors and motor box.

Tuesday, February 3, 2009

Plowing alot and It is starting to look like a boat!

Here on Button Bay ice fishing season is well under way. I have been out the ice is about a foot thick and have not caught a thing. My father in law caught a can! Really.

I have put in the wiring, oil line, and tach cable in my previous post and this time around I have started to put the boat back together and it looks pretty nice. I put the dash back in and the cover for the steering shaft.


After I got the dash in I thought I would tackle the front bench back, which proved to be a challenge. I put the back in place and I wanted to cross drill the screws from the back of the stringer that the seat back rested against. From the factory they screwed from the front of the seat back to the board I mentioned then put another stringer board in front of the seat back. Thi meant if you ever wanted to remove the front bench seat you would have to take up the floor remove the front stringer and then remove the seat back. If I drilled the screws from the back I would only have to remove the floor behind the seat back and remove the screws to remove the seat back. Even though the section of floor behind the seat is big it is easier to work out in the open than under the bench seat.


I ran into trouble while putting in the supports on one side and had not 1 but 3 screw bulges. I really tried to line the support up with th eexisting holes but my bit had to be off. I essentially redrilled the hole at a slightly different angle, but now I have ot fix the bulges! Rats


I had to put a ratchet strap around the boat to bring the sides in to have them meet up better for the side supports. My boat was not perfect and the side supports always showed but I thought I would try to pull it in and it came in a little. I had an alteration to my boat by a previous owner in that they drilled a hole through the hull and put a long screw through the hull and the side bench support then used a bracket to attach this all to the seat back, interesting and pretty solid!


All in all pretty productive and I have moved onto figuring out stainless screws for my brightwork. I think things will start to pick up and I am getting excited to see the boat take shape. More to come from the frozen north.